Star Crunch Cookies Easy Nostalgic Chocolate Treats
Star Crunch Cookies are more than just a nostalgic treat; they’re a portal back to simpler times, a whisper of childhood joy baked into every bite. Remember those irresistible, no-bake wonders from the lunchbox or the local convenience store? The magic of Star Crunch Cookies lies in their unique texture – a delightful crunch from puffed rice cereal, a chewy embrace from creamy peanut butter, and that sweet, satisfying coating that always left a hint of chocolatey bliss. What makes these homemade versions so special is the ability to recapture that exact flavor and texture, but with the added warmth of being made with love right in your own kitchen. They’re incredibly easy to whip up, making them perfect for a quick treat, a party favor, or simply when that craving for something wonderfully chewy and crunchy strikes. Get ready to relive those sweet memories with our foolproof recipe for authentic Star Crunch Cookies.
Star Crunch Cookies
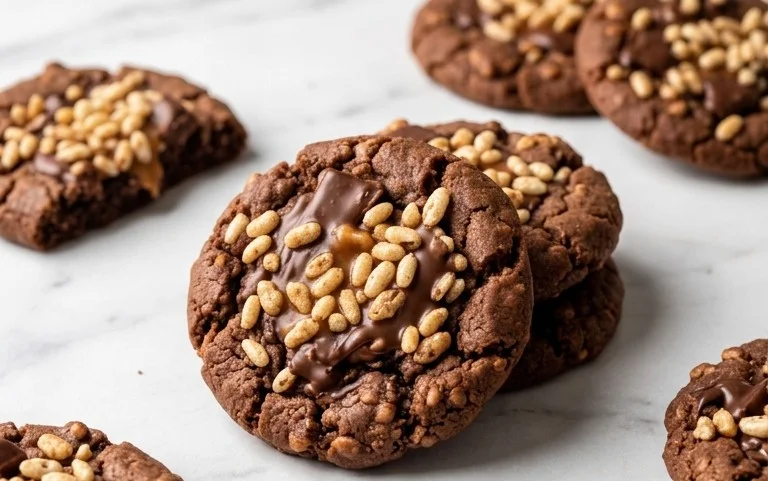
Get ready to blast off into a galaxy of flavor with these incredible Star Crunch Cookies! If you’re a fan of those iconic, crunchy, chocolate-covered treats that bring back childhood memories, prepare to be amazed. These homemade versions capture that irresistible texture and sweet, nutty taste with a simple, wholesome twist. They’re surprisingly easy to whip up, making them perfect for a quick after-school snack, a fun weekend baking project, or even a unique addition to your party spread. Forget the store-bought versions – these are fresh, customizable, and utterly delicious.
The beauty of these Star Crunch Cookies lies in their straightforward assembly. We’re talking about a no-bake wonder that relies on simple pantry staples and a little bit of melting and mixing. The combination of crispy rice cereal, creamy peanut butter, rich chocolate, and a touch of maple syrup creates a symphony of textures and tastes that is truly out of this world. Plus, the coconut oil helps everything bind together beautifully and gives the chocolate coating that signature glossy finish.
Let’s dive into what you’ll need to create these celestial delights.
Ingredients:
- 5 cups Crispy Rice Cereal (140g)
- 1 1/2 cups Chocolate Chips (255g)
- 1 cup Peanut Butter (can use any nut or seed butter, 250g)
- 1/4 cup coconut oil (55g)
- 1/2 cup maple syrup (160mL)
Crafting Your Star Cruch Masterpieces
Now for the fun part – bringing these ingredients together to create edible stars!
Preparing the Base Mixture
The first step is to create the delicious, sticky foundation for your Star Crunch Cookies. In a large bowl, combine your 1 cup of peanut butter, 1/4 cup of coconut oil, and 1/2 cup of maple syrup. This is where the magic starts to happen. Gently warm these ingredients together. You can do this in a few ways. My preferred method is to place the bowl over a saucepan of simmering water (a double boiler) and stir until everything is smooth and melted. Alternatively, you can microwave the mixture in 30-second intervals, stirring in between, until it’s fully combined and liquidy. Be careful not to overheat it, as you don’t want the sugars to burn. The goal is a smooth, pourable consistency. Once you have this lovely, gooey mixture, it’s time to add the star of the show: the crispy rice cereal.
Pour the 5 cups of crispy rice cereal into the bowl with the melted peanut butter mixture. Now, using a sturdy spatula or a large spoon, gently fold the cereal into the wet ingredients. You want to ensure every single piece of cereal is coated in the peanut butter mixture. This is a crucial step for achieving that perfect crunchy yet slightly chewy texture in every bite. Don’t be afraid to get in there and really mix, but try not to crush the cereal too much. We want to maintain its crispiness. The mixture will start to feel quite thick and substantial.
Forming the Stars
Once the cereal is thoroughly coated, it’s time to shape your Star Crunch Cookies. You have a few options here, depending on how you want your stars to look. For classic, round-ish Star Crunch shapes, you can lightly grease your hands with a little coconut oil or cooking spray and scoop portions of the mixture. Then, gently press and shape them into flattened discs or slightly irregular mounds. They don’t need to be perfect; a little rustic charm is part of their appeal! Another method, if you have cookie cutters handy, is to press the mixture firmly into the bottom of lightly greased cookie cutters on a parchment-lined baking sheet. This gives you more defined star shapes, though it can be a bit more challenging to get the mixture to stick perfectly within the cutters. Regardless of the method, aim for cookies that are about ½ to ¾ inch thick. This thickness is ideal for getting a good coating of chocolate later on.
Place the formed cookies onto a baking sheet lined with parchment paper or wax paper. This is essential to prevent them from sticking. Make sure to leave a little space between them, although they won’t spread much during the chocolate-dipping process. If you’re aiming for the most authentic Star Crunch look, you might want to press them down slightly more on the bottom to create a flatter surface for dipping.
The Chocolatey Finale
This is where the Star Crunch Cookies truly come to life! We need to melt our chocolate chips and coconut oil to create that irresistible coating. In a microwave-safe bowl, combine your 1 1/2 cups of chocolate chips and the remaining 1/4 cup of coconut oil. Again, you’ll want to microwave this in 30-second intervals, stirring thoroughly after each interval, until the chocolate is completely smooth and melted. The coconut oil is key here; it helps to thin out the chocolate, making it easier to coat the cookies, and it also gives the final coating that signature snap and shine once it sets. You can also use a double boiler for this step if you prefer. Once the chocolate is smooth and glossy, it’s ready for dipping.
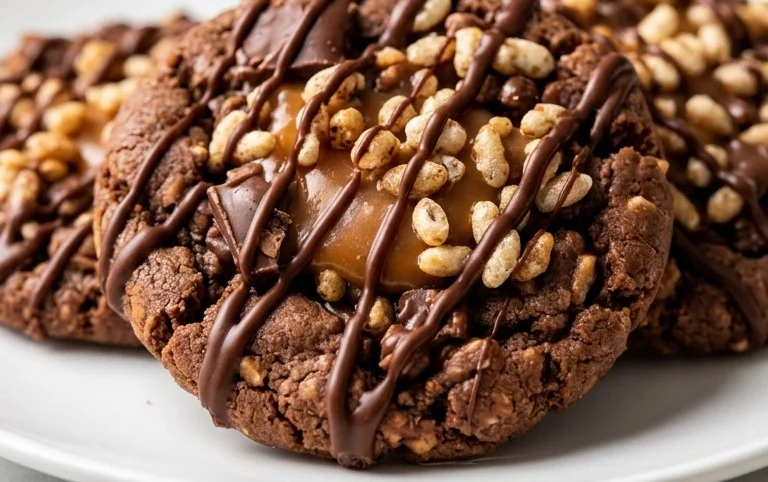
Now, carefully take each formed cookie and dip it into the melted chocolate. You can use a fork or a skewer to help you hold the cookie. Submerge about two-thirds to three-quarters of the cookie into the chocolate, ensuring a good, even coating. Gently lift the cookie out, letting any excess chocolate drip back into the bowl. You can then place the chocolate-coated cookie back onto the parchment-lined baking sheet. For an extra touch, you can use a spoon to drizzle a little extra melted chocolate over the top of the cookie, creating those signature swirl patterns. Repeat this process for all of your cookies.
Setting and Enjoying
Once all your Star Crunch Cookies are dipped and decorated to your liking, it’s time to let them set. Place the baking sheet in the refrigerator for about 20-30 minutes, or until the chocolate is completely firm. This chilling process is crucial for achieving that satisfying crunch. Once the chocolate has hardened, your Star Crunch Cookies are ready to be enjoyed! Store them in an airtight container at room temperature or in the refrigerator if your kitchen is particularly warm. They are best enjoyed within a few days to maintain their optimal crispness. Prepare yourself for an explosion of flavor and texture that will transport you back to those cherished childhood snack times!
Conclusion:
There you have it – the ultimate guide to creating delicious Star Crunch Cookies right in your own kitchen! I truly hope you’ve enjoyed learning how to whip up these delightful treats. What makes this recipe so fantastic is its incredible balance of textures and flavors. The slight chewiness of the cookie base, the sweet crunch of the cereal, and that irresistible chocolatey coating come together in perfect harmony. They are wonderfully simple to make, making them an ideal project for bakers of all skill levels, and a surefire hit with family and friends.
These Star Crunch Cookies are incredibly versatile when it comes to serving. They are perfect as a standalone treat with a glass of milk, or they can be a delightful addition to a dessert platter for parties and gatherings. Imagine them alongside some brownies or a fruit salad – a real crowd-pleaser! For those who love to experiment, consider adding a pinch of sea salt on top of the chocolate for a sweet and salty twist, or even drizzling with a contrasting color of melted chocolate for extra flair. Don’t be afraid to get creative!
I genuinely encourage you to give this Star Crunch Cookie recipe a try. It’s a recipe that brings joy, both in the making and the devouring. You won’t regret adding these to your baking repertoire!
Frequently Asked Questions:
Can I make Star Crunch Cookies ahead of time?
Absolutely! Star Crunch Cookies store beautifully. Once they’ve completely cooled and the chocolate has set, you can store them in an airtight container at room temperature for up to 3-4 days. They are often even better the next day as the flavors meld together.
What kind of chocolate is best for the coating?
For the best melt and flavor, I recommend using good quality semi-sweet chocolate chips or chopped chocolate bars. Milk chocolate or even dark chocolate can also be used depending on your preference. Ensure you use melting chocolate or add a little bit of vegetable shortening or coconut oil if you’re using regular chocolate to help it melt smoothly and set well.
Star Crunch Cookies
No-bake, chewy, and chocolatey cookies inspired by the classic snack, made with crispy rice cereal and peanut butter.
Ingredients
-
5 cups Crispy Rice Cereal (140g)
-
1 1/2 cups Chocolate Chips (255g)
-
1 cup Peanut Butter (250g)
-
1/4 cup coconut oil (55g)
-
1/2 cup maple syrup (160mL)
Instructions
-
Step 1
Line a baking sheet with parchment paper. -
Step 2
In a large bowl, combine the Crispy Rice Cereal, peanut butter, coconut oil, and maple syrup. -
Step 3
Stir until all ingredients are well combined and the cereal is coated. -
Step 4
Gently fold in the chocolate chips. -
Step 5
Drop spoonfuls of the mixture onto the prepared baking sheet. -
Step 6
Refrigerate for at least 30 minutes, or until firm.
Important Information
Nutrition Facts (Per Serving)
It is important to consider this information as approximate and not to use it as definitive health advice.
Allergy Information
Please check ingredients for potential allergens and consult a health professional if in doubt.