Easy Dirt Cups Recipe – Fun Chocolate Pudding Treat
Dirt cups start with the satisfying crunch of crushed Oreos and end with the playful wiggle of gummy worms peeking out from rich chocolate pudding. They’re the kind of dessert that instantly brings a smile, whether you’re a kid making them for the first time or an adult reliving childhood memories. We’re talking about a simple, no-bake treat that’s perfect for parties, rainy afternoons, or anytime you need a little bit of fun. The beauty of dirt cups is their simplicity, and how easily you can customize them.
Ingredients:
- 3.4 ounces box instant chocolate pudding mix
- 2 cups milk
- 8 ounces whipped topping (thawed)
- 10-12 Oreo cookies (crushed)
- 32 gummy worms
Making the Pudding Base
First things first, we need to get our chocolate pudding ready. The key to instant pudding is getting the liquid to milk ratio just right. For a 3.4-ounce box of instant chocolate pudding mix, you’ll need exactly 2 cups of cold milk. It’s important to use cold milk; warm milk won’t allow the pudding to set up properly and you’ll end up with a runny mess instead of a thick, creamy pudding. Pour the 2 cups of milk into a medium-sized mixing bowl. Then, dump in the entire contents of the instant chocolate pudding mix box. Don’t be shy, get every last bit out! Using a whisk, start mixing the pudding mix and milk together. You’ll want to whisk vigorously for about two minutes. This whisking action is what helps the pudding start to thicken and incorporates air, making it light and fluffy. As you whisk, you’ll notice it transforming from a thin liquid into a thicker, spoonable consistency. Once it starts to thicken up, about two minutes of whisking, stop and let it sit for a few minutes before the next step.
Dirt Cups
Dirt cups start with the satisfying crunch of crushed Oreos and end with the playful wiggle of gummy worms peeking out from rich chocolate pudding. They’re the kind of dessert that instantly brings a smile, whether you’re a kid making them for the first time or an adult reliving childhood memories. We’re talking about a simple, no-bake treat that’s perfect for parties, rainy afternoons, or anytime you need a little bit of fun. The beauty of dirt cups is their simplicity, and how easily you can customize them.
Ingredients:
- 3.4 ounces box instant chocolate pudding mix
- 2 cups milk
- 8 ounces whipped topping (thawed)
- 10-12 Oreo cookies (crushed)
- 32 gummy worms
Making the Pudding Base
First things first, we need to get our chocolate pudding ready. The key to instant pudding is getting the liquid to milk ratio just right. For a 3.4-ounce box of instant chocolate pudding mix, you’ll need exactly 2 cups of cold milk. It’s important to use cold milk; warm milk won’t allow the pudding to set up properly and you’ll end up with a runny mess instead of a thick, creamy pudding. Pour the 2 cups of milk into a medium-sized mixing bowl. Then, dump in the entire contents of the instant chocolate pudding mix box. Don’t be shy, get every last bit out! Using a whisk, start mixing the pudding mix and milk together. You’ll want to whisk vigorously for about two minutes. This whisking action is what helps the pudding start to thicken and incorporates air, making it light and fluffy. As you whisk, you’ll see the mixture go from a thin liquid to a noticeably thicker consistency. Don’t over-whisk, just a good two minutes should do it. Once it’s well combined and starting to thicken, you need to let it sit for about five minutes. This resting period is essential for the pudding to fully set and reach that perfect jiggly texture we’re aiming for. You’ll notice it gets even firmer after it sits.
Incorporating the Whipped Topping
After the pudding has had its five-minute rest and has thickened up nicely, it’s time to make it even more luxurious. You’ll have your 8 ounces of whipped topping, making sure it’s fully thawed if it was frozen. This is what gives our dirt cups that airy, cloud-like texture that contrasts so well with the rich chocolate pudding. Gently spoon the thawed whipped topping into the bowl with the thickened chocolate pudding. Now, instead of whisking vigorously like you did before, you want to fold the whipped topping into the pudding. Use a spatula or a large spoon and carefully fold the two mixtures together. This means using an up-and-over motion, bringing the pudding from the bottom of the bowl up and over the whipped topping, and gently incorporating it. The goal here is to combine them thoroughly without deflating the whipped topping too much. You want streaks of whipped topping to disappear, leaving you with a smooth, homogenous, and light chocolate mixture. Don’t overmix; as soon as you don’t see distinct white streaks of whipped topping, you’re good to go. This folded mixture is the “dirt” for our cups, and it should be light, fluffy, and delicious.
Crushing the Oreos
No dirt cup is complete without its “dirt,” and that’s where our Oreo cookies come in. You’ll need about 10 to 12 Oreo cookies for this. The easiest way to crush them is to place them in a sturdy zip-top bag. Seal the bag, making sure to get as much air out as possible. Then, you can use a rolling pin, the bottom of a heavy pan, or even your hands to crush the cookies into fine crumbs. You want a texture that resembles soil, so avoid large chunks. Some people like to leave a few slightly larger pieces for texture, which is totally fine. You can also use a food processor for this if you have one, just pulse it a few times until you get the desired consistency. Think of this as the gritty earth our gummy worms will be tunneling through. Once crushed, set these crumbs aside; we’ll use them in the assembly process.
Assembling the Dirt Cups
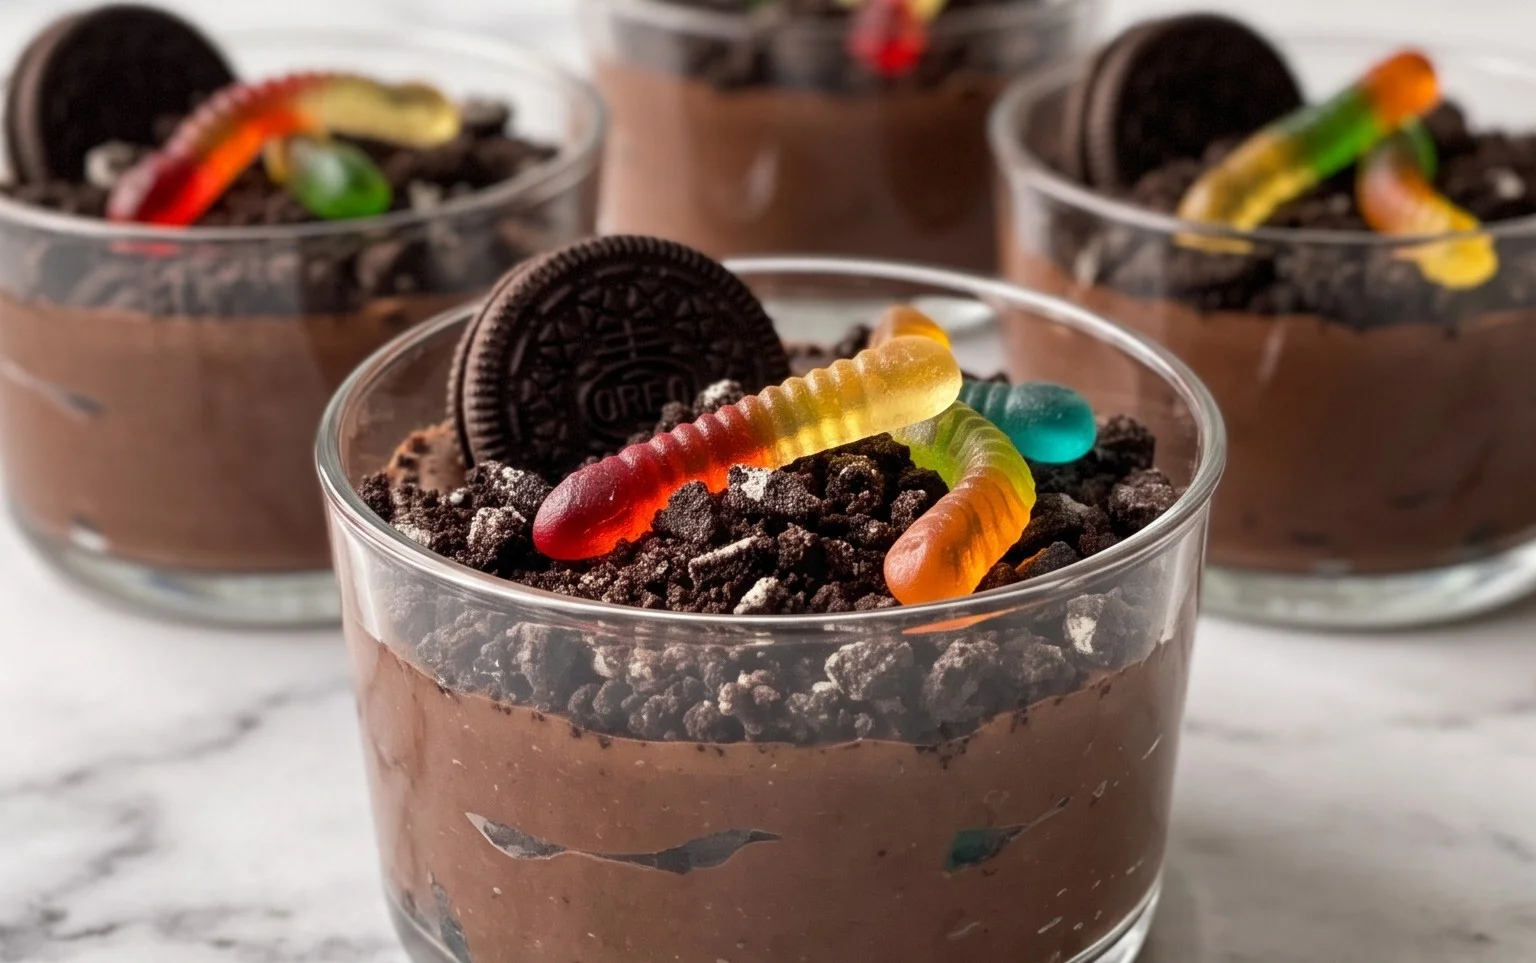
Now for the fun part: putting it all together. You can use any small clear cups, jars, or even small flower pots for this to really enhance the look. Start by spooning a layer of your chocolate pudding and whipped topping mixture into the bottom of each cup. You don’t need to fill it all the way, just enough to create a base. Next, take a generous sprinkle of your crushed Oreo cookie crumbs and sprinkle them evenly over the pudding layer. This is your first layer of “dirt.” After that, add another layer of the chocolate pudding mixture on top of the cookie crumbs. Then, add another layer of crushed Oreos. You can do two or three layers depending on the size of your cups and how much pudding and cookie crumbs you have. The idea is to mimic layers of soil. You want enough pudding and cookie crumbs so that the cups feel substantial and look appealing.
Adding the Gummy Worms and Finishing Touches
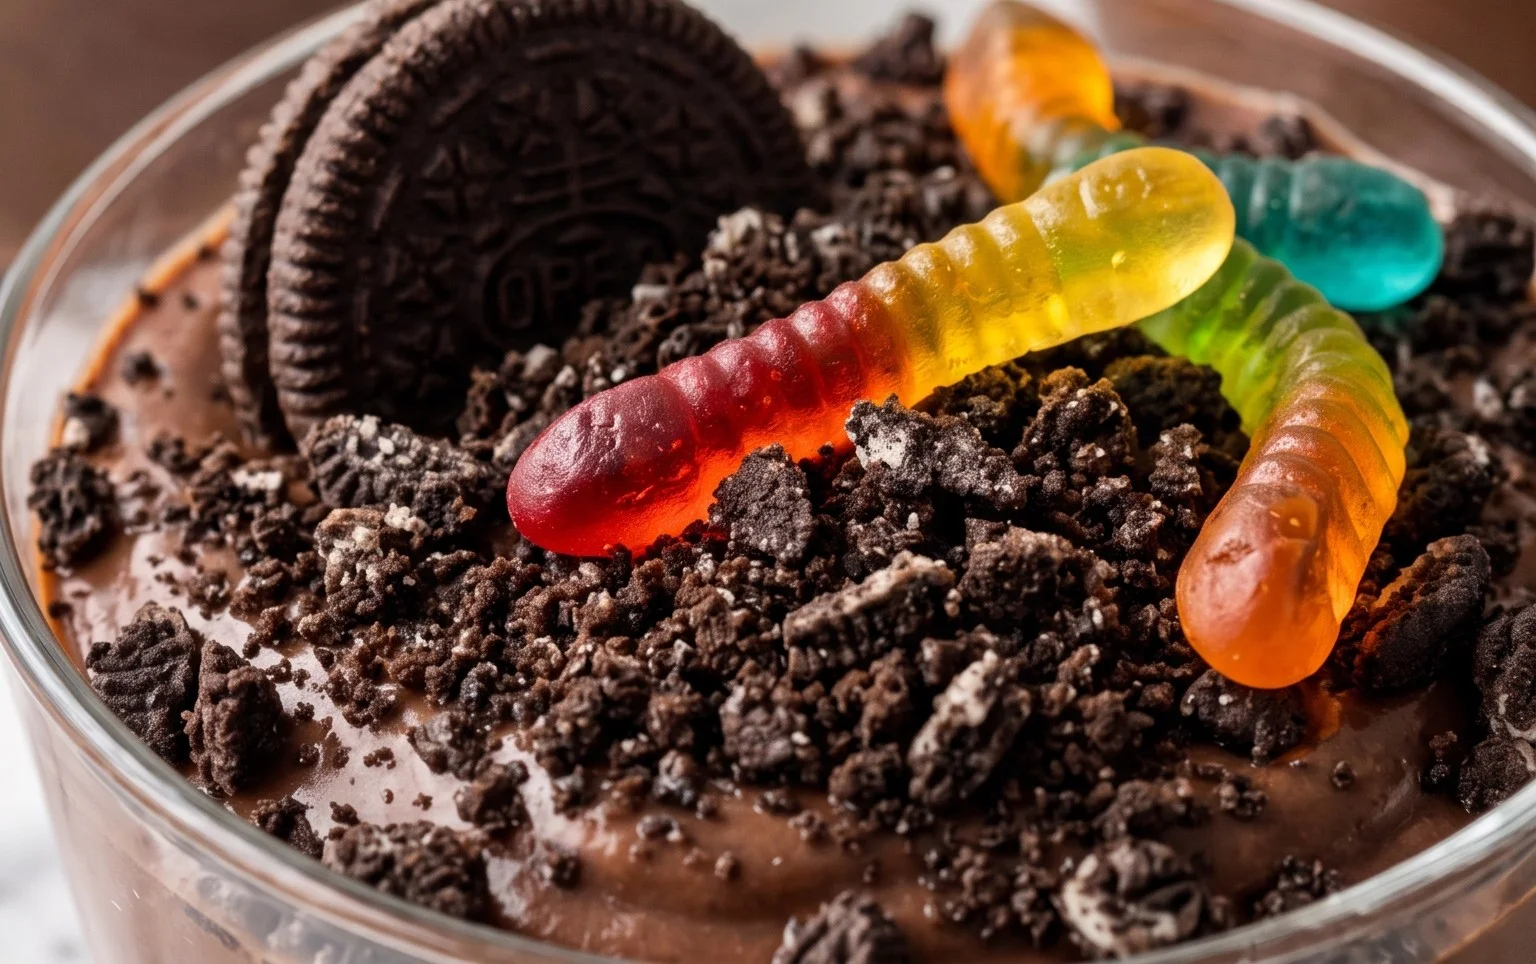
This is where the magic truly happens. Once you have your layers of pudding and dirt complete, it’s time to add the stars of the show: the gummy worms. You have about 32 gummy worms to work with, so distribute them among your cups. Gently push the gummy worms into the top layer of pudding and cookie crumbs so that they look like they’re crawling out of the dirt. Some can be sticking straight up, others can be partially buried, and some can even be hanging over the edge of the cup. Get creative with it! You can also add a few extra sprinkles of cookie crumbs on top if you like, to make it look even more realistic. These dirt cups are best served chilled, so once they are assembled, cover them loosely with plastic wrap and pop them in the refrigerator for at least 30 minutes before serving. This allows the flavors to meld together and the pudding to firm up even more. They’re a delightful, edible prank and a delicious treat all rolled into one.
Conclusion:
And there you have it – your very own dirt cups, ready to bring a smile to anyone’s face. This recipe proves that simple ingredients and a little bit of fun can create a dessert that’s both delicious and memorable. It’s the perfect treat for kids to help make, adding an element of play to dessert time. Serve them up at your next birthday party, family gathering, or just as a special weekend surprise. The combination of creamy pudding, crunchy Oreos, and sweet gummy worms is a classic for a reason.
Serving and Variations:
These dirt cups are best served chilled. You can make them a few hours ahead of time and keep them in the refrigerator. For variations, try using different flavored pudding mixes like vanilla or butterscotch, or even a white chocolate pudding. You could also swap the Oreos for chocolate graham crackers or chocolate wafers. For an extra layer of fun, add a few candy flowers on top or use sour gummy worms for a tart kick. You can also experiment with different sizes of cups or even a large trifle bowl for a family-style dessert.
Frequently Asked Questions:
Can I make the pudding ahead of time?
Yes, you can prepare the pudding base a day in advance. Store it in an airtight container in the refrigerator. It’s best to assemble the dirt cups closer to serving time to keep the Oreo crumbs from getting too soggy, but they will still be tasty if assembled earlier.
What else can I use instead of whipped topping?
If you don’t have whipped topping, you can use an equal amount of cool whip or even a stabilized whipped cream. To make stabilized whipped cream, whip heavy cream with a little powdered sugar and a tablespoon of cornstarch or gelatin until stiff peaks form. This will give you a similar light and airy texture.
Are there any nut-free options?
Most standard Oreo cookies are nut-free, but it’s always a good idea to check the packaging for specific allergen information. If you need a completely nut-free version, look for certified nut-free chocolate sandwich cookies. You can also use chocolate wafer cookies or even crushed gluten-free chocolate cookies.
Dirt Cups
A fun and easy no-bake dessert layered with chocolate pudding, crushed Oreos, and gummy worms.
Ingredients
-
3.4 ounces box instant chocolate pudding mix
-
2 cups milk
-
8 ounces whipped topping (thawed)
-
10-12 Oreo cookies (crushed)
-
32 gummy worms
Instructions
-
Step 1
In a medium bowl, whisk together the chocolate pudding mix and milk. Beat until well combined and slightly thickened. -
Step 2
Gently fold the thawed whipped topping into the chocolate pudding until no streaks remain. -
Step 3
Crush the Oreo cookies until they resemble dirt. You can do this in a zip-top bag with a rolling pin or in a food processor. -
Step 4
In individual serving cups or a larger dish, start by layering some of the crushed Oreo cookies at the bottom. -
Step 5
Spoon a layer of the chocolate pudding mixture over the cookie crumbs. -
Step 6
Add another layer of crushed Oreo cookies, followed by another layer of pudding mixture. -
Step 7
Top each dirt cup with a few gummy worms, sticking them into the pudding to look like they are crawling out of the dirt. -
Step 8
Refrigerate for at least 30 minutes before serving to allow the pudding to set.
Important Information
Nutrition Facts (Per Serving)
It is important to consider this information as approximate and not to use it as definitive health advice.
Allergy Information
Please check ingredients for potential allergens and consult a health professional if in doubt.